Wednesday, November 7, 2012

Merry and Bright

As I was making Christmas/Holiday cards for OWH, I tried to find some images that were light and fun and that could be used for kids without being too juvenile.  I love this image for that reason!


Too cute!

Wednesday, October 17, 2012

More Winter Cards

Even though there are not a lot of images that lend themselves to seasonal (not holiday specific) winter cards, here is another that I really like.  It is very simple, but cute enough that it could be for kids or adults!


Monday, October 15, 2012

Christmas/Winter Cards

Even though we are not yet to Halloween or Thanksgiving, OWH is wrapping up receipt of Christmas Cards to get overseas in time for service people to send them home!  In addition to making traditional Christmas Cards, I also made some Winter cards that could be used well into the beginning of next year.  This one just makes me smile!


I tried using the Viva Pearl Pen for the "dots", but haven't yet mastered getting it to really look like a half round pearl. 

Monday, September 24, 2012

Black and White and Red All Over

I love the classic combination of Black and White and Red.  I used it here to make a clean and simple card that could be used for multiple occasions.


I chose to use no sentiment to make it really versatile!

Wednesday, September 12, 2012

Using Scraps

This is a great way to use up small scraps that are left laying around.  The pattern doesn't need to match, as these do.


Thursday, September 6, 2012

Celebrate!

I tend to stay with simple designs. I'm not good at figuring out embellishments that look good - my blinged up cards end up looking like my craft room exploded on them!

This one is simple, using dry embossing, an offset punch and patterned paper.


I ran a marker around the edge of the sentiment paper to give it some dimension and make it pop.

Saturday, August 25, 2012

OWH Pizzazz Blog Skip

Welcome everyone to the OWH Pizzazz Blog Skip!  This is the first stop after leaving OWH Stars and Stamps.  I really had fun putting together some samples for today.

I focused on paper piercing (with a dab of dry embossing tossed in).  Paper piercing is simply putting holes in paper to add a decorative or design element.  I use the Tim Holtz retractable paper piercer.  You do not need a specialized tool for this pizzazz element.  You can use a regular sewing needle and pick the size that fits your project!

There are also plastic templates that can be used for specific patterns.


This card was mad using Stampin' Up templates that are made to go with punches and dies.  The small sentiment has an oval shaped pierced around it.  I used this instead of inking the edges of the oval to make it stand out.  The scallops along the bottom and the edge of the Thanks sentiment are cut with Stampin' Up dies and pierced using a SU template as well.


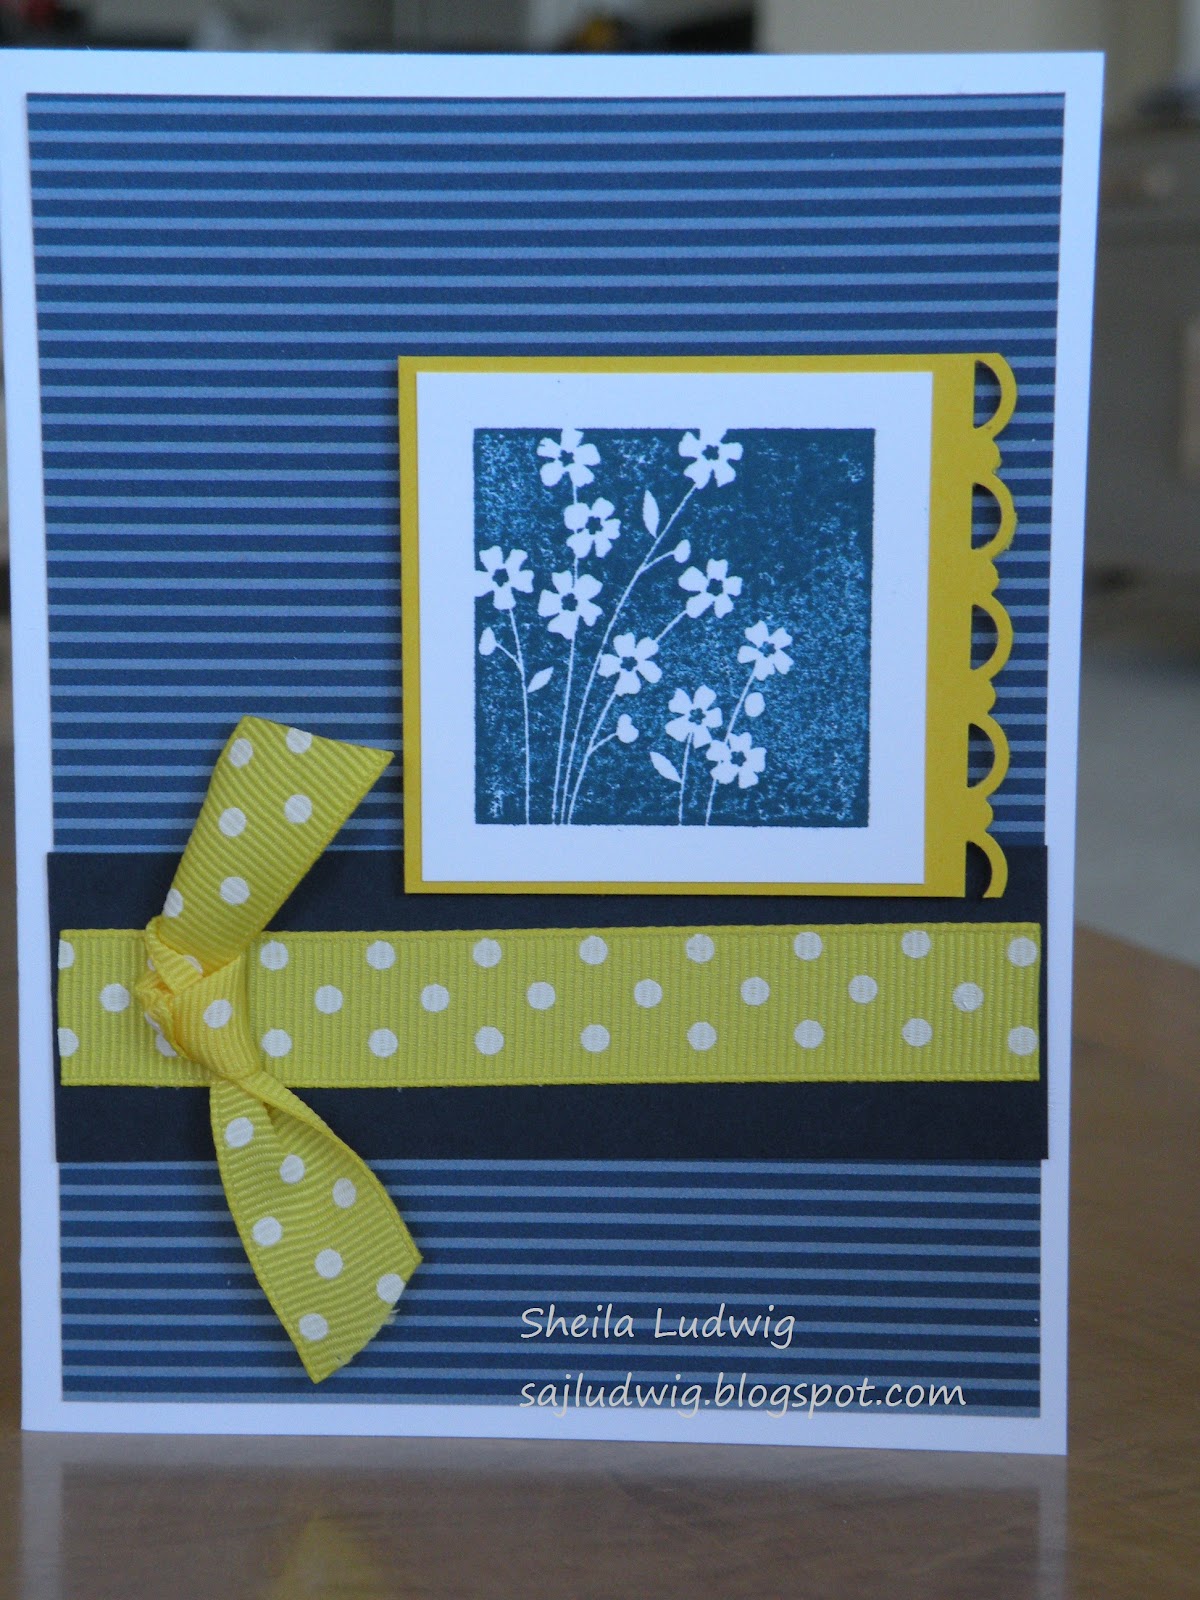
On this card, I used a simple circle to frame the softly stamped flower.  I also used dry embossing on the background for added interest.

If you don't have templates, you can use a simple ruler for straight lines or small round items for circles!


In this card, I used a ruler to make corner holes instead of using a corner rounder for interest. (I'm sorry that the photo doesn't show the pattern on the darker cardstock very well.)

I am not a very brave soul, but I am sure that some of you out there could come up with some pretty awesome free-hand patterns for your cards!

Thanks for stopping by!  Enjoy the skip by heading to Velda's blog for the next round of fun!

Sheila

Thursday, August 2, 2012

OWH Marathon

Last weekend I attended Crop Around the Clock, a local crop where you can work from 5 pm Friday until 5 pm on Sunday.  I decided to make lots of card kits for work on for the weekend.  Here is one of my favorites from the 151 cards that I made.  I will share more in the next few days.


Friday, July 13, 2012

Stretch Your Stamps Class Day 5 - Take 2

The second card I made today was with the focus on the sentiment.  I used a scrap of patterned paper and scrap of plain paper. To play off the circles on the scrap paper, I used one of the geometric stamps from the Paper Smooches set and Versamark ink to add dimension to the plain cardstock.


I also used Tim Holtz Distress Inks on the background of the sentiment.  Instead of using water, I used Mister Huey's Color Mist in Shine.  It doesn't show in the photo, but there are streaks of shine mixed in with the colors.  I am still quite the novice with this technique, but it has been fun to play with.

Stretch Your Stamps Class Day 5

Today's challenge involves sentiment stamps.  Not having the specific stamps used in class, I decided to mix up stuff from Day 2 using Tim Holtz inks and a sentiment I love.


I made the background using watercolor paper and Tim Holtz Distress Inks.  Then I stamped the flowers to one side and clear embossed them.  Then I masked the right side and did direct to paper with black on the left side.  The sentiment is embossed with white and again the color is direct to paper.

Thursday, July 12, 2012

Stretch You Stamps Class Day 4 - again

This is the second card I made.  I used 4 of the stamps from the Paper Smooches set.  I used copper embossing powder that I have had for forever!


Stretch Your Stamps Class Day 4

I didn't do day 3 because I don't have any alphabet stamps.  So, today I made two cards.

The first one, I used one stamp to stamp patterns in different colors.  I used the new Stampin' Up In Colors for 2012 - 14. Trying to line up the pattern is much easier when you use clear stamps!


Wednesday, July 11, 2012

Stretch Your Stamps Class Day 2

Today was a challenge for me.  Almost all of the cards I do are CAS.  In addition, I have never really played with the "Tim Holtz Technique".  I combined bits from a couple of the examples to make my card.  It certainly is a work in progress, but something I want to continue to play with.

I double embossed the background, the large stamp with clear embossing powder and the butterflies with white.  I expected there to be more contrast between the two, but the white paper behind the clear showed up nearly the same color as the white embossing powder - learning experience!


Monday, July 9, 2012

Stretch Your Stamps Class

Today is the first day of the Stretch Your Stamps class.  I'm hoping to get lots of motivation from this class to kick things into gear!

I used the Studio Calico/Hero Arts background stamp on both cards. The Celebrate card I used the double stamping technique using a Kaleidoscope ink pad. 


Wednesday, July 4, 2012

Any Hero Card for the 4th!

This is one of the cards I have made for Any Hero. These are cards that are sent to the troops and distributed to deployed heros, hopefully to boost morale.

Happy 4th of July to all!  Thanks to all who serve or have served in the past!


Sunday, July 1, 2012

More Copic Fun

I'm still playing with Copics - I really wish there would be a class close enough for me to attend to really get a grip on them!

I love this image and I love that it can be used for many different things!


Tuesday, June 19, 2012

For The Kids

I used my Cricut to make images for cards for the kids of deployed heros.  I am still struggling to come up with sentiments for these images and cards.  These were cut using the Dreams Come True and Sesame Street Friends.


Thursday, June 14, 2012

Zebra - Black & White........& Red!

I love the simplicity of this zebra stamp - it has such impact!  Adding red gives it more interest and pop!


Saturday, June 9, 2012

Butterfly Love

I am still experimenting with my Copics - think I have a way to go yet. I also used Operation Write Home Sketch #2 to use some Stampin' Up scraps.


Friday, June 8, 2012

Baby Card

I found this little bunny on the Create a Critter Cricut Cartridge and new it needed to be on a baby card!  So cute!


Tuesday, June 5, 2012

Cricut Card

I use my Cricut a lot for my scrapbooking and only recently have started using it more in my cardmaking for images beyond kids stuff. I'm going to have to explore my cartridges in a different way!


Wednesday, May 30, 2012

New Copic Marker Storage

I was getting near capacity with my old storage container for my Copic Markers.  I used the same internal frame design (fluorescent light insert, bolts, nuts, washers) to make a new frame to put in my 31 Square Utility Tote.  This is so easy to move around the house, yet keeps all my markers in color order (which is how I function best) so they are very easy to find.


Now I can add to the collection! It's amazing that no matter how many colors you have, it seems as if you never have the right one!

Tuesday, May 22, 2012

Monday, May 14, 2012

Spring Flowers

The blue and yellow remind me of some of the wonderful colors of spring - love spring!


Thursday, April 26, 2012

Hello, Doily!

Red, black and white are some of my favorite colors to combine!


Saturday, March 31, 2012

Saturday, March 24, 2012

Spring Flowers

Spring is one of my favorite times of the year. I love the many different colors and flowers.

Thursday, March 22, 2012

Find Joy Every Day

I love the color combinations in this card - so bright and cheery - just like the wonderful spring weather we have been having!


Tuesday, March 20, 2012

More OWH Cards

I have spent the last few weeks "tiptoeing" into retirement by spending a month in Florida. (Of course, up north has been one of the warmest months on record - go figure!).  My biggest challenge in packing was how and what to bring so I could continue making cards. As much as I could, I tried to plan out the cards I wanted to make and try to bring just those supplies.  With just over a week to go here, I am going to have to make some notes as to how to pack the next time!

Here is one of the cards I made - quite generic so it can be used for most any occasion.

Thursday, February 16, 2012

Copic Marker Fun

This is a stamp I have had around for a very long time. I played with Copic Markers for the flowers and then added the butterflies for whimsy!


Friday, February 10, 2012

Playing with Copics

I have been playing with Copic Markers recently.  I have not been able to find a class close to me to really learn how to use them, so I use Sandy's tutorials on OWH and other online information.  This is a card I sent to OWH.

Saturday, February 4, 2012

Operation Write Home Blog Skip

Welcome to the next stop on the OWH blog skip!  I am so excited to be participating with so many talented card makers!  You have arrived here from Sue's blog. If this is your first stop and you would like to start at the beginning, head to the Stars and Stamps blog.

The CAS class that I was most drawn to was the Tone on Tone class with the layered die cuts.  I used my Cricut with the Paper Lace cartridge to cut the large, intricate details, making the 6 under layers white and the top layer colored.  The circles were made with punches.


Then I decided to try it another way. This time I used tone on tone plain and patterned paper.  I used the Stampin' Up Beautiful Wings Embosslits.  I used the colored paper (checkerboard) for each layer of the butterflies (instead of the white as above).


I used the same patterned paper for the side strip as for the butterflies.  I chose a second pattern for the sentiment (on dimensionals), which is from the OWH/Hero Arts Year Round Sentiments.

Even though this technique is a bit time intensive, I love the look and results!  I hope you take the time to play around with it. 

Jennifer is giving away 3 spots in the class for prizes - 2 to commenters on blogs, and 1 to someone who links up a new mojo CAS card on S&S!!  Make sure you leave lots of love (and comments) on all the blogs for your chance to win! 

Thanks so much for stopping by and participating in the blog skip.  Now you are off to Lisa's blog for the next stop!

Sheila

Wednesday, February 1, 2012

Monochromatic Card

I love the simplicity and color combination of this card.  This is one that I made many kits for our Operation Write Home Card Making party last fall.

Friday, January 27, 2012

Celebrate!

I love the look of black and red together! This is a card made for our large OWH Card Making Party that I hosted last fall.  I think it makes a good masculine card as well.

Thursday, January 26, 2012

Children's Cards

Today, I would like to share some cards made for OWH for kids!  I can't even begin to imagine how hard it would be to be away from your children during deployment, so I was thinking fun and bright!


These were all cut with a Cricut machine. Hopefully they gave some child a smile for a day!