Monday, September 9, 2013

Copic Framed Picture

One of the beautiful images that we practiced coloring on at the Copic Certification Classes was one of my favorite flowers - the lilac!


After returning from the classes, I decided I wanted to re-color the image and see if I felt it was good enough to frame and hang in my house.  This is how it turned out!


I am lucky enough that my Dad frames pictures as a hobby, so I got a mat and already had a 12x12 scrapbook page frame.


I love the way it turned out!  Now I just need to find the perfect place to hang it!


Monday, August 26, 2013

6 x 6 Paper Pad Tutorial

A while back, I ran across the 6 x 6 paper pad tutorial on OWH (http://operationwritehome.org/tutorial-6x6-template/) for using an entire pad for cards.  The idea hung around the back of my mind for use in the future.  A couple weeks ago, I found this wonderful paper pack by Bo Bunny, Autumn Song Collection.  


I decided to put it to the challenge to make Fall/Thanksgiving cards for OWH.  


I had to go to the original post at http://kathrynscards.blogspot.com/2013/05/6x6-cutting-formula.html to really get the big picture.  Then I started cutting (above) and trying to keep all the pieces straight!  It was quite the challenge at times.  I finally had to make piles of each sheet cut, and then was finally able to pick up the pieces in the ordered needed.

I have only used about half the pack and have 20 cards!!  [I have some pieces left over and am not sure what I missed :)]


Thanks so much to those who come up with these wonderful ideas and share with the rest of us!

In addition to the Bo Bunny Autumn Song Collection, I used Stampin' Up cardstock in Wild Wasabi, Always Artichoke, Garden Green, Cajun Craze, More Mustard and Pumpkin Pie.  Stamps used were Stampin' Up Day of Gratitude, Papertrey Ink Signature Greetings II, There She Goes Sentimental, Hero Arts Find Joy and Year Round Sentiments.  Dies are also Papertrey Ink Counting Your Blessings. Inks are Stampin' Up in Always Artichoke and Cajun Craze.

Tuesday, July 30, 2013

Long-term Projects

I've been taking a bit of a break from making cards trying to get my daughter's wedding album done. Talk about being a bit behind..........the wedding was just over 4 years ago! One of the big challenges has been taking a picture that had a tripod in the background that I wanted out of the picture.  On the one hand, I wish I had kept track of the hours I spent on this picture, working in Adobe Photoshop Elements.  On the other hand, I'm kind of glad I didn't!!


As you can see on the far right, there is the tripod.  I wanted to enlarge this photo to use as a focal point on the page.  I finally managed to make it disappear!  I can't believe what people must have to do to "photoshop" some of these things you see online.

After all the work, I finally got the page done - minus the tripod!


Whew - it was worth the work!

Thursday, July 25, 2013

New Copic Box

I have been looking for a new "home" for my copic markers.  My 31 bag was good for a while, but it was too deep and the bottom of the make-shift filler was allowing the bottom to sag, thus making access to some of the markers quite difficult.

I looked all over for a decorative box that wasn't too deep, had a secure lid, had handles for easy moving, etc.  I also wanted it to be big enough that this could be my last box. I was not so successful at finding one that fit all my needs.  As I was wandering through Staples one day, I noticed a plastic box that seemed to fit all my needs!  It is made by the Really Useful Box company (made in the USA as a bonus), 17 ltr size.


 I emptied out my old box to get to the pieces parts for the new grid.  I was feeling really lazy and didn't want to put all the markers in one big pile to sort out later.  I put a bunch of plastic cups hiding in the closet to use.


Then we got the florescent light grid (the old fashioned kind) from Home Depot and took the carriage bolts, washers and lock nuts from the old grid.  We measure the grid to fit in the new box.


Because I wanted something more decorative than clear plastic, I decided to try and decorate my own.  I took Designer Paper from Stampin' Up from the Quatrafancy design.  I cut pieces to fit the sides, ends and part of the top.  I would like to find a way to cover all the sides and top.


Time to put both the grid and the markers back in!


I took the whole box with me yesterday to a crop. All the markers stayed in place, even when I turned the box sideways for transport.  It also has room to grow so that in the event I ever get all the Sketch Markers, there is room for them!

Sometimes function beats pretty!


Monday, June 24, 2013

Practice, Practice, Practice

So, what we heard as kids - if you want to master a skill - practice!  This is especially true with Copic Markers.  After attending the Certification Classes, I've been practicing.  If you can't get to a class, I would suggest the book series, Copic Coloring Guide by Colleen Schaan and Marianne Walker (Annie's Paper Crafts).  They are fabulous!  Currently there are 3 volumes with Volume 4 set to come out any day now!


After returning from the classes, I pulled the Level 3: People back out. Levels 2 & 3 both come with CD's as a bonus!  The CD with Level 3 has pages with multiple faces/hair to practice coloring.  Those are the things I struggle most with.  So, I have been practicing, practicing, practicing.........


I made sure to use the same cardstock to print the practice sheets that I normally stamp my images on so that the colors will be the same.  I have been using X-Press It Blending Card, designed to use with Copics.


Some of the combos I like, some not so much.  I have 3 hole punched them and put them into my Copic reference notebook.  Now, I can just look at these pages and pick the combination that I want to use.


Now, I am going to try and take on some images to use on cards and hopefully feel better about my "people" and how they look!

So, practice, practice, practice.  It does pay off!!

Saturday, June 8, 2013

Copic Certification

Last weekend, I was lucky enough to attend both the Standard and Intermediate Certification classes for Copic Markers.  Taught by the wonderful Cindy Lawrence, we had two full days of coloring and more technique than the brain could hold.

At the end of the Intermediate Class, we had a final project to incorporate many of the techniques.  It also happened to be one of my favorite flowers - lilacs!


We worked blending, shading, cast shadows and more.  I still struggle with the challenge of picking colors, especially for shading. More practice......


It was a fabulous weekend!  I'm so glad that I was finally able to get to the classes.  It was a great experience!

Best part is now being a Certified Copic Instructor!!

Monday, May 27, 2013

Memorial Day

I finally got a chance to play today and decided to make Any Hero Cards for OWH.  It seemed appropriate for the day.  I have lots of red, white and blue scraps, pre-cut pieces, and quite a few pre-stamped sentiments that I wanted to put to use.


To all who have served, Thank You.  It can never be said enough.  Let us continue to honor those whose sacrifice allows us to live as we do.

Monday, May 13, 2013

Wedding Shower Card

A good friend is getting married and I was at a loss for a card that wasn't your typical shower card.  I came up with the following, and am hoping it works!


I combined lots of different elements.  The flowers are Memory Box Die Chloe Stem.  The edge is cut with Stampin' Up Adorning Accent Edgelits and highlighted on the inside with Washi Tape (unknown). The sentiment is from Stampin' Up So Happy For You (in Basic Gray) stamp set and cut with the large label single die from Stampin' Up (retired) on white and Basic Gray.  I added a small bow to look like a bouquet of flowers made from Stampin' Up, 1/4" Sycamore Street in Tangerine Tango.  Two of the Chloe Stems are mounted with dimensionals.

Hope you enjoy!

Tuesday, May 7, 2013

More Card Kit Cards

Here is another card from the kits I made for gifts.  It is quite simple, but makes an impact!


It could be used for multiple occasions - I hope those who received it have all used it for different purposes!

Monday, April 29, 2013

Reorganized Craft Room

It has been a crazy couple of months with travel and other stuff!  I finally decided that I was frustrated enough with how my craft room wasn't working that it was time to do something about it.  Along the way, I have gotten some of the Recollections cubes from Michaels. I had some old small bookcases that I just stacked stuff on and was constantly digging through piles.

I also had lots of little organizing containers that were taking over my workspace and it was out of control!  I went back to Michaels and got more cubes and replaced the bookshelves.  I had lots of help yesterday putting together all the pieces parts and finished putting everything away this morning.

I'm hoping this new way to organize will allow me to work more efficiently and not make such a huge mess as I work.  Fingers crossed!!


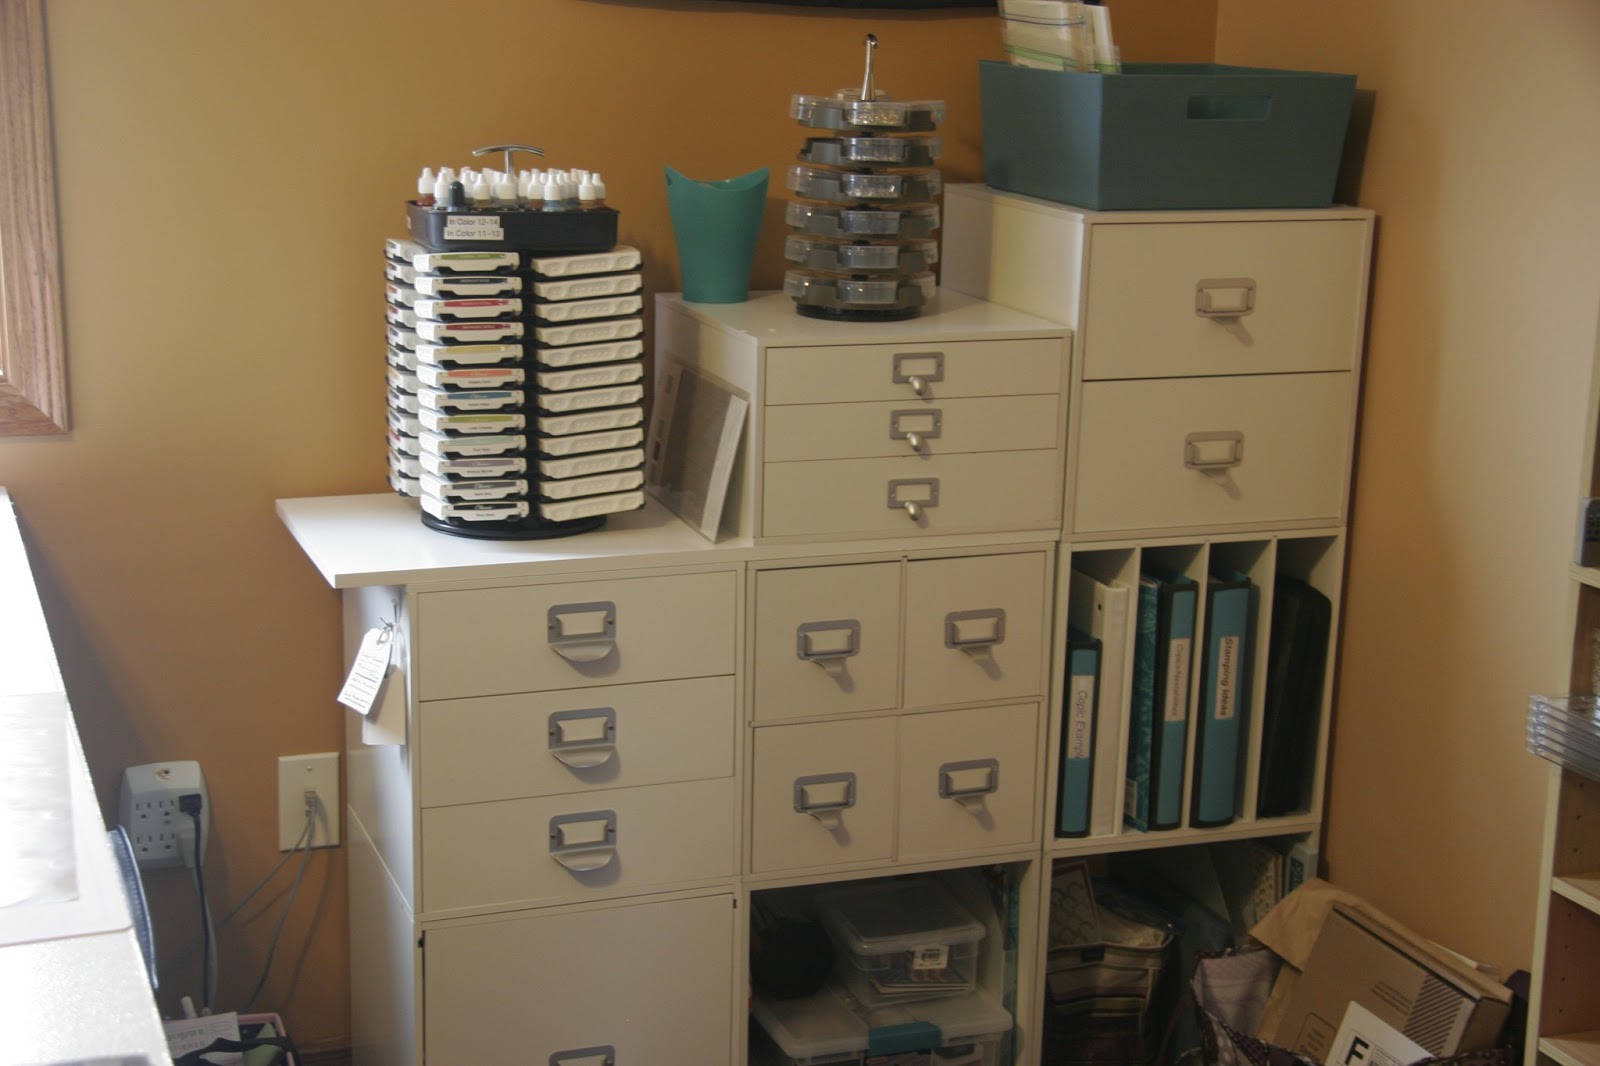
I took over my son's room a few years ago.  This is where I have my stamping stuff.  I have all my ink pads, both on top and in a drawer, embellishments, ribbons, idea books, etc., etc.


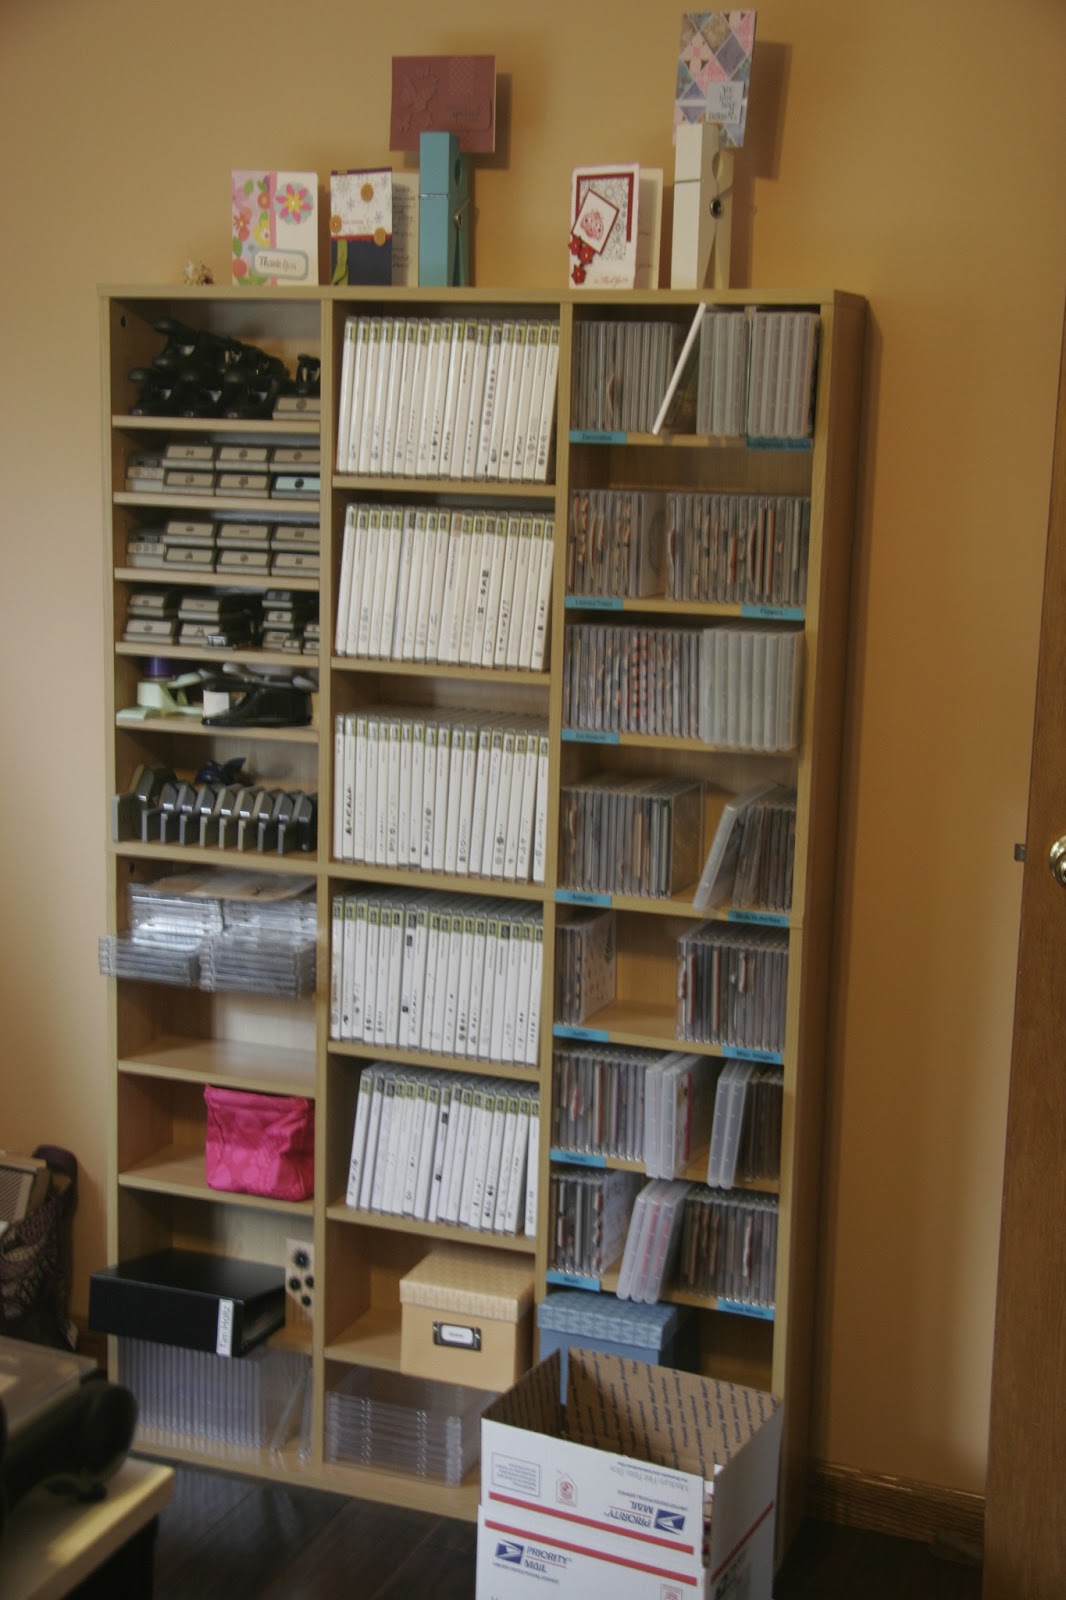
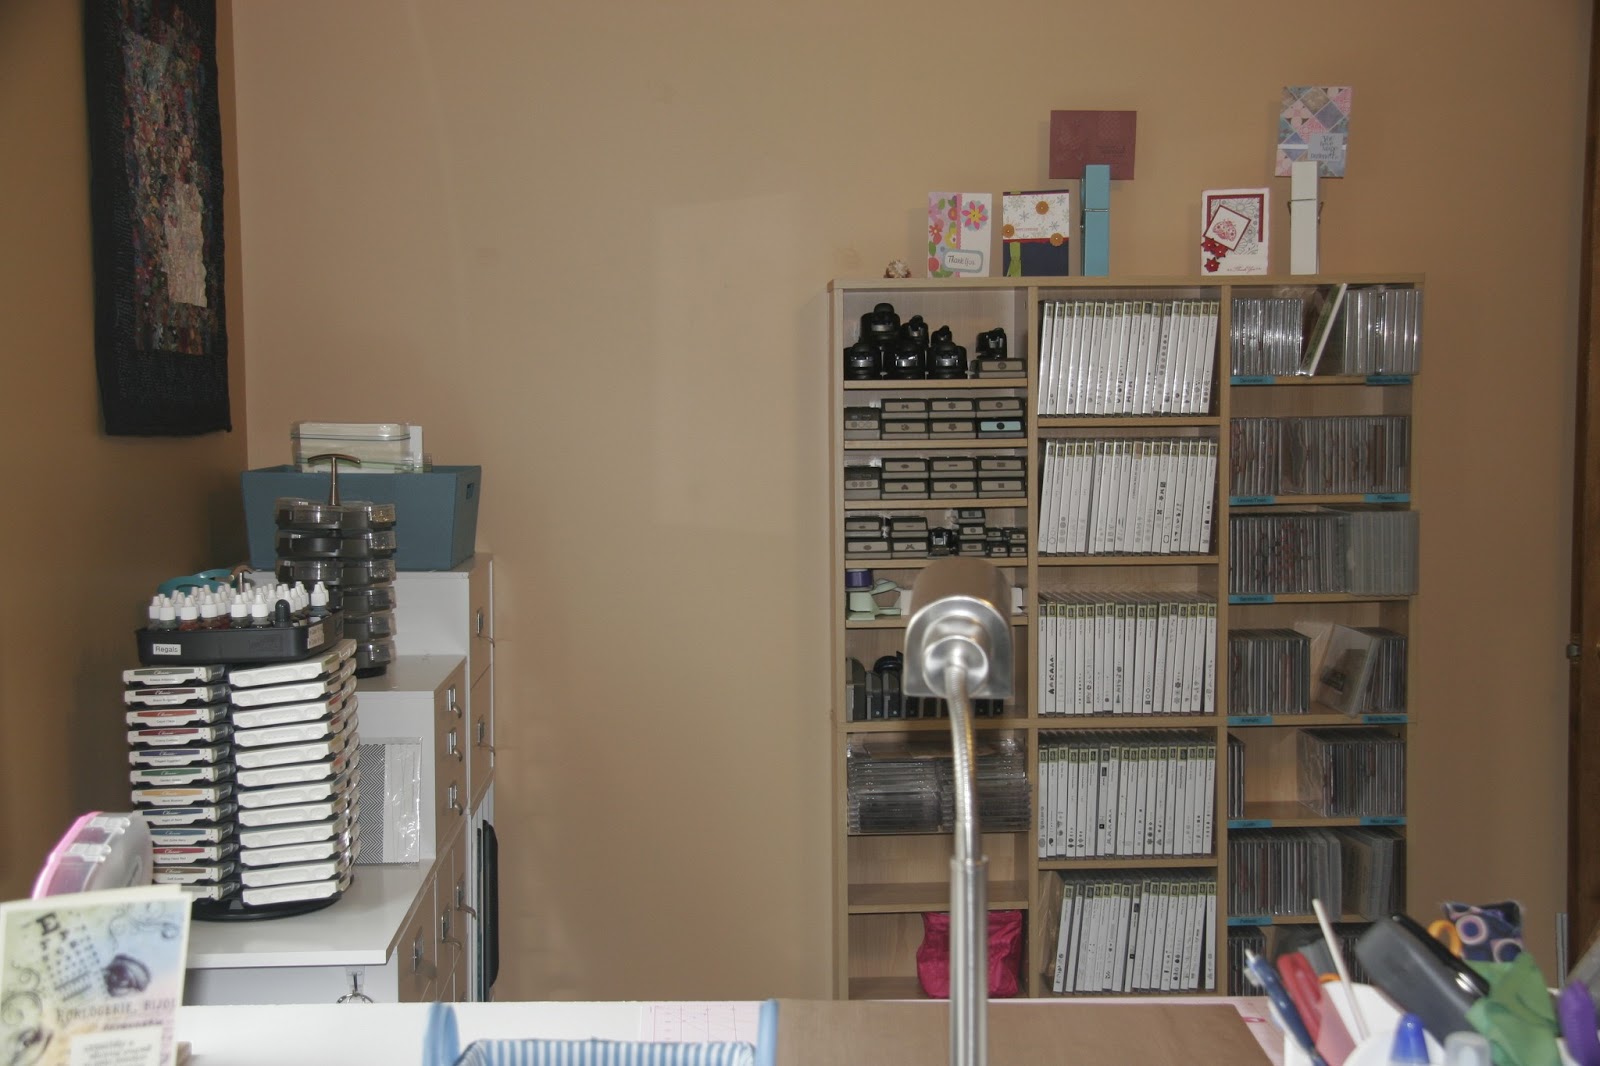
This is an upcycled DC/DVD holder that houses my stamps and punches.  I spent quite a bit of time unmounting all my wood stamps and putting them into CD/DVD cases.  I was able to reduce the space of the wood mounts substantially!  On the bottom right is a box of cards nearly ready to go off to Operation Write Home!  Most all of the cards that I make go to this fabulous organization that sends handmade cards to deployed heros so that they can send them home to family and friends!


This is my work area.  I used 2 pieces of MDF and painted them white.  They are supported on each end (both sides) with a 2-drawer file cabinet and Closet Maid wire drawers on the other end.  All my 8.5 x 11 cardstock is in the file cabinets and often used items in the wire drawers.  At the end I hung a covered bulletin board to put cards for display.  The right side is where I do my stamping and the left side is for scrapbooking.


The other side of the room houses my scrapbook stuff and online class books.  On the top is my Cricut and on the Clip-It I have my Cricut cartridges hung in plastic envelopes.  It is pretty full - gonna have to sort through and take out the ones I don't use much to make room. Hanging on the wall to the right are magnetic trays and canisters that hold lots more embellishments.  One of these days I might use them all - ha!


The top row of notebooks are all the PDF's from the Online Card Classes that I have taken.  The bottom is all the 12 x 12 cardstock.


The 2 drawers at the top of the right section holds all my embossing folders and dies.  The bottom row holds my ongoing scrapbooks so that I can add pages as they are finished. A few years ago I started using "The Big Picture" approach to  scrapping as presented by Stacy Julian in her book "photo freedom".  I have found it very liberating. When I was scrapping chronologically, I always felt behind and didn't think I would ever catch up.  This approach has allowed me to scrap what I want when I want and it works!


The other corner houses my computer/printer/scanner and my light box for photos.  I also use the closet with old, tall bookcases and existing shelves for lots of storage of other stuff.


Hope you have enjoyed the tour!  I am really excited to see how well it works for me!

Sheila